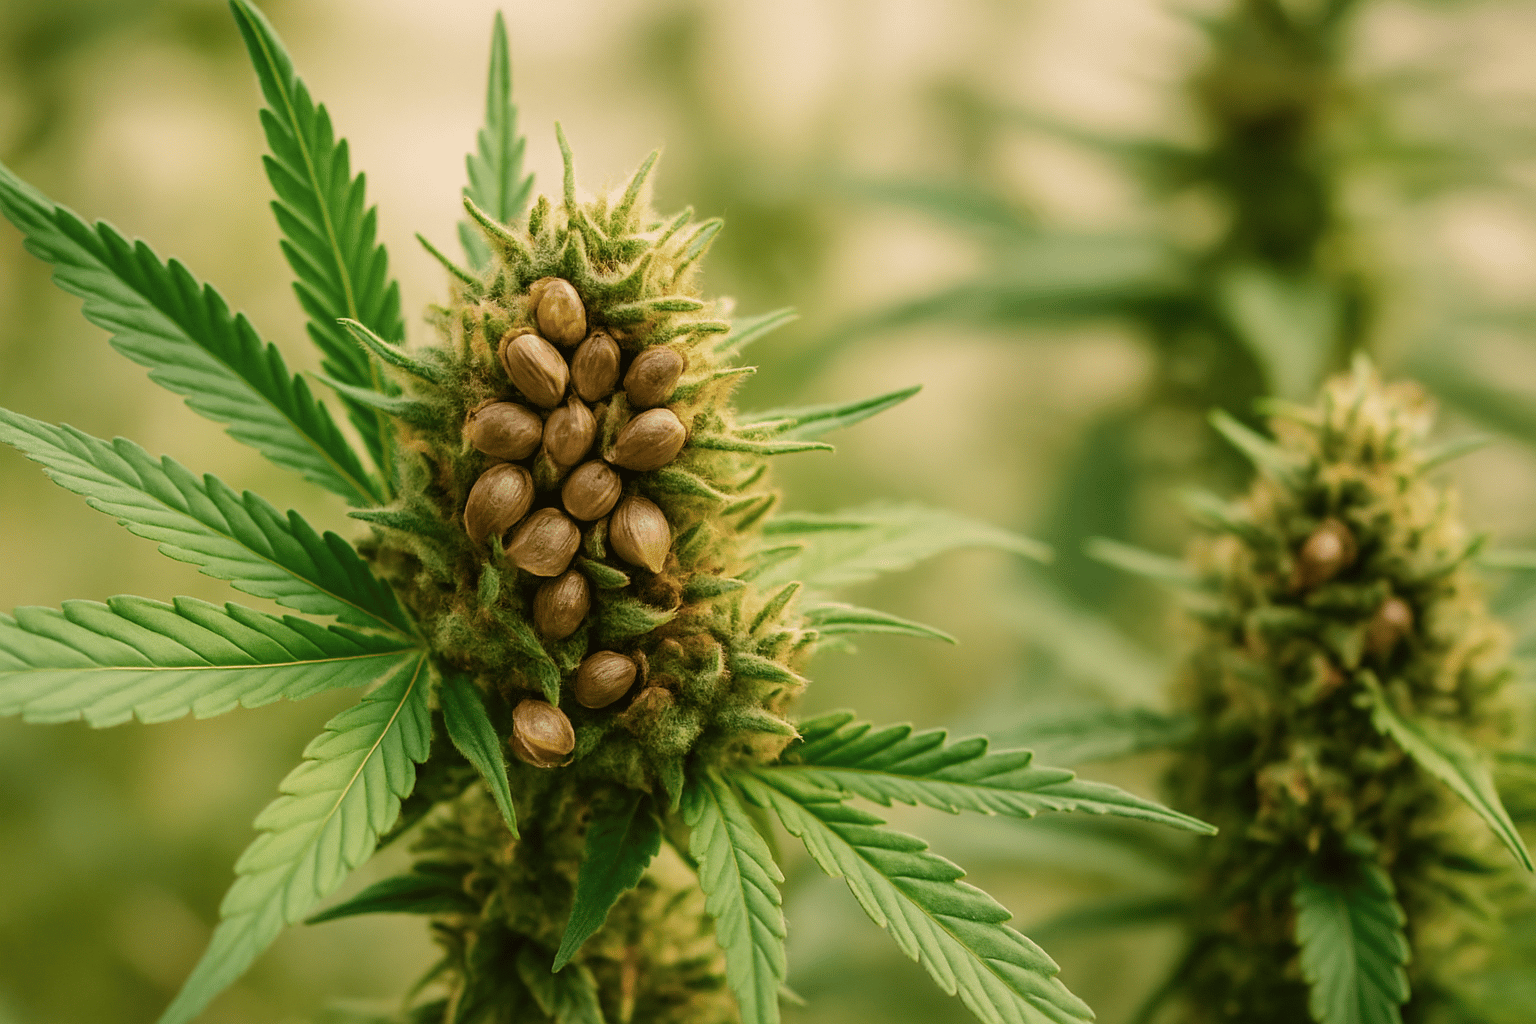
Why Harvesting Cannabis Seeds Requires More Planning Than Many Think
Harvesting cannabis seeds sounds simple at first: pollinate the plant, wait, collect the seeds. In practice, however, careful preparation determines whether you end up with truly mature, hard, viable seeds or just pale, soft, unreliable grains. In our experience, seed harvesting is far more error-prone than many hobby growers expect because it differs significantly from a normal flower harvest.
Anyone who wants to produce seed stock must grow differently from someone who only wants to harvest flowers. After successful pollination, the plant shifts energy and nutrients into seed formation. This changes growth, resin production, and often the structure of the flowers as well. That is exactly why it pays to choose breeding plants deliberately and control pollination precisely, instead of simply leaving a male pollen donor standing uncontrolled in the room or garden.
It is also especially important to separate your goals: Do you want to produce many seeds for future runs, pollinate individual branches for a small selection, or specifically test a cross? This decision affects the entire process. For growers who first want to understand the plant’s life cycle properly, it is also worth taking a look at Cannabis Growth Stages: A Guide to Every Phase of Development, because seed harvesting only works reliably when you truly have timing and plant development under control.
Requirements for Viable Cannabis Seeds
Viable seeds are not created by just any pollination, but by the complete maturation of the seed coat and the embryo inside. In our experience, most cultivars need around 4 to 6 weeks after pollination, some closer to 6 to 7 weeks, before the seeds are truly finished. If you harvest too early, you often get green or beige seeds with a soft shell. These germinate irregularly or not at all.
The mother plant must be supplied consistently during this phase. Extreme drought, severe overfertilization, intense heat above 30 to 32 °C, or mold infestation can significantly impair seed development. Moisture is a particular risk in dense, pollinated flowers. That is why the climate during the ripening phase should be managed carefully: indoors, ideally around 22 to 26 °C at 40 to 50% relative humidity, tending toward the lower end in the final weeks. Outdoors and in the greenhouse, good air movement is crucial. If you grow under glass, you will find practical guidance in Growing Cannabis in a Greenhouse: Climate, Protection, and Strong Yields Under Controlled Conditions.
Another point many underestimate: seed quality depends heavily on the genetics of the parents. Weak, unstable, disease-prone, or stressed plants often pass these traits on. If you want to produce seeds for personal use, work only with plants that have impressed you in growth, aroma, health, flower structure, and ripening behavior. A poor mother or unsuitable pollen donor cannot be “compensated for” later.
Identifying and Selecting Male and Female Plants Deliberately
For classic seed production, you generally need one male and one female plant. Male plants form pollen sacs at the nodes, meaning the junctions between the main stem and side branches. Female plants show early flower calyxes there with white hairs, the stigmas. With regular seeds, you should check sex early so that unwanted full pollination does not occur.
When selecting the male, many people make the mistake of simply keeping the first specimen they find. Experienced breeders, by contrast, pay attention to growth structure, internodal spacing, vigor, resistance to stress, and the smell of stem rub or pre-flowers. Of course, a male does not produce finished buds, but it still gives clues about its potential. We have often seen that particularly weak or very early-degenerating males later produce weaker offspring as well.
With the female plant, selection is usually easier because you can assess structure, flower set, and overall performance more directly. Look for robust development, clean flowering, no signs of hermaphroditism, and ideally no pest or virus issues. If you work with clones, a healthy starting point is especially important. Otherwise, diseases and latent problems are carried into the breeding line.
Control Pollination Instead of Ruining the Entire Grow
The biggest beginner mistake in seed harvesting is uncontrolled pollen drift. Cannabis pollen is extremely fine and spreads easily through air, clothing, tools, and hands. A single open male at the wrong moment can pollinate an entire flower room. If you want consumable, as seedless as possible flowers alongside seed stock, you should therefore only pollinate individual branches or selected plants deliberately.
In our experience, manual pollination works most reliably: collect mature pollen from the male, apply it with a fine brush or cotton swab to fresh white flower hairs on the female plant, and keep the treated branch as still as possible and away from drafts for 24 hours. Alternatively, a small paper bag containing pollen can be placed over a branch. Then mark the branch. That way, you will know exactly where to expect seeds later.
The best time for pollination is usually about 2 to 3 weeks after the start of flowering, when enough fresh stigmas are present but the calyxes are not yet overripe. If you pollinate too early, there is still too little flower mass. If you pollinate too late, some seeds will no longer fully mature. If you want to optimize your timing in flower, Cannabis Flowering Stage: How to Control Yield, Resin Production, and Quality will also help.
Caring for Pollinated Plants Until Seed Maturity
After pollination, care requirements change slightly, but not radically. The plant still needs a stable supply of water, phosphorus, potassium, calcium, and trace elements. What it does not need is panicked “pushing” with high EC values. A common mistake is overfertilizing under the assumption that this will produce larger or more numerous seeds. In reality, excessive salt levels are more likely to cause root stress and impair ripening.
In this phase, we get the best results with moderate, consistent nutrition. In soil, the pH of irrigation water is usually best at around 6.2 to 6.7; in coco, more like 5.8 to 6.2. These are not dogmas, but good practical ranges in which nutrient uptake remains stable. If the plant shows deficiency symptoms during seed formation, the seeds often become smaller and less uniform. You can find more on this in Fertilizing Cannabis: Nutrients, Dosage, and Common Mistakes Under Control and Watering Cannabis Properly: Water, Timing, and Common Mistakes Under Control.
Plant structure is also important. Pollinated buds become denser and heavier, while in some cultivars their airiness decreases. This increases the risk of Botrytis, especially outdoors in late summer or in poorly ventilated rooms. Check seed-bearing branches regularly for rotten spots, dead leaf material, and trapped moisture inside the flowers. It is better to intervene early than to lose entire seed sites later.
When Cannabis Seeds Are Truly Ripe
You cannot identify ripe seeds solely by the fact that the plant as a whole “looks finished.” What matters is the condition of the individual seeds. Fully mature cannabis seeds are usually hard, appear dry, and are significantly darker than immature ones. Typical colors are brown, gray, or dark olive, often with marbled or tiger-like striping. Immature seeds tend to remain light green, beige, or almost white and can be pressed in more easily between the fingers.
A very reliable sign is an opened flower calyx. When the calyxes swell and partially open so that the seed becomes visible, that is a good stage of maturity. In our experience, it is worth removing 2 to 3 test seeds from different parts of the plant. If they are hard and cannot be damaged with a fingernail without pressure, that is a good sign. Soft, moist, or milky-pale seeds usually need more time.
The following overview helps with assessment:
| Characteristic | Immature | Ripe |
|---|---|---|
| Color | Light green, cream, pale | Brown, gray, dark, often patterned |
| Hardness | Soft, easily pressed in | Hard, stable seed coat |
| Calyx | Hardly swollen | Clearly swollen, partly opened |
| Ease of removal | Firmly embedded in plant material | Can be removed relatively easily |
| Viability | Often poor or uneven | Usually high with proper storage |
If in doubt, wait a few more days as long as there is no risk of rot. Harvesting too early is one of the most common reasons for disappointing germination rates. Harvesting too late is usually less problematic, as long as the plant remains healthy and the seeds are not damaged by wet conditions, mold, or mechanical loss.
Harvesting Cannabis Seeds: Step by Step in Practice
For small quantities, we prefer to harvest seeds dry and manually. To do this, first cut the pollinated branch or the whole plant and dry it for 7 to 14 days in a dark, well-ventilated room. Ideal conditions are around 18 to 22 °C and 45 to 55% humidity. Drying makes it much easier to remove the seeds and reduces the risk of residual moisture causing problems during later storage.
After drying, place the branches on a clean surface and carefully break apart the dried flower clusters. Mature seeds often fall out on their own. The rest can be loosened by gently rubbing between your fingers or over a fine sieve. Work cleanly and without haste. Pressing too roughly damages the seed coat, especially in cultivars with a somewhat thinner seed coat.
In the next step, sort out the plant material. Small leaves, dry calyx remnants, and dust should be removed as thoroughly as possible. For larger quantities, a set of two sieves with different mesh sizes can be helpful. We have had good results letting the seeds dry openly on paper or cardboard for another 5 to 7 days before placing them into containers. Immediately after removal, many seeds appear dry but often still contain residual moisture inside.
- Cut the pollinated branch or plant
- Dry gently for 7 to 14 days
- Carefully break apart the flower clusters
- Separate seeds from plant debris
- Allow to dry further for 5 to 7 days
- Store only hard, fully mature seeds
Common Mistakes When Harvesting Seeds and How to Avoid Them
The first major mistake is harvesting too early. Many growers go by general flower ripeness instead of seed maturity. That does not work for seed stock. Even if the rest of the plant is already declining, individual seeds may still be ripening. Therefore, always check the seeds themselves, not just trichomes or leaf color.
The second common mistake is poor hygiene in pollen management. Pollen sticks to clothing, hair, and tools. Anyone who goes straight into the flower room after working with the male often spreads it unknowingly. We recommend separate clothing, thorough hand washing, and ideally always working with males or pollen last. Briefly switching off fans during pollination also prevents unnecessary spread.
A third mistake is improper storage immediately after harvest. Putting freshly harvested seeds into airtight containers while they still contain residual moisture quickly leads to condensation, mold, or internal aging. Storage in warm rooms, on sunny windowsills, or in damp basements is equally problematic. Seed stock is living material. If you want to treat it properly, you must keep it dry, dark, and cool.
Proper Storage for Long-Term Viability
Well-matured cannabis seeds can remain viable for several years if stored correctly. Three factors are crucial: low moisture, stable cool temperatures, and no light. In our experience, small airtight containers made of glass or high-quality plastic work best, supplemented with a desiccant pack. The seeds should be fully dried beforehand.
For most home growers, storage at around 6 to 10 °C in a stable area of the refrigerator is ideal. It is important to minimize temperature fluctuations. If the container is constantly opened or stored in the door compartment, stability suffers. If you only have small quantities, you can additionally pre-sort the seeds into paper envelopes and then place these in the main container. That way, you do not unnecessarily expose the entire supply to room air every time.
Before a germination test or sowing, cold-stored seeds should first come to room temperature while the container is still closed. This prevents condensation on the seed coat. A simple practical tip: it is better to keep a few containers with clear labels by cultivar, date, and parent plants than to end up later with unmarked seed mysteries. Especially with your own crosses, clean documentation saves an enormous amount of trouble.
Which Plants Are Especially Suitable for Producing Your Own Seed Stock
Not every plant is automatically a good candidate for seed harvesting. For stable results, robust, healthy specimens with clear, reproducible traits are best suited. If you grow outdoors, mold-resistant and weather-tolerant cultivars are especially useful because seed maturity often extends into a wetter part of the season. This also fits well with The Best Cannabis Strains for Outdoor Growing in Germany 2026.
For beginners, it is usually wiser to first produce seeds within a proven line instead of immediately planning complex multiple crosses. That way, you learn how the parents behave, how stable the offspring grow, and whether certain traits appear dominantly or variably. In our experience, small, controlled projects are almost always more educational than large, confusing seed productions with too many variables.
If your actual goal is less breeding and more a predictable grow, it may make sense to work with stable genetics or healthy clones instead of producing your own seeds. You can find suitable seed options in the shop under THC Seeds. This allows you to first gain experience with growth behavior, flowering, and selection before moving on to targeted propagation.
Legal Considerations, Responsibility, and Clean Documentation
When harvesting cannabis seeds, you should always observe the currently applicable legal regulations in your location. Rules can differ, especially regarding breeding, propagation, transfer, and storage. Anyone operating in a legal gray area or only half understanding the rules risks unnecessary problems. If in doubt, it makes sense to check official information or seek qualified advice.
Equally important is clean documentation of your plants. Record the cultivar, parent combination, date of pollination, harvest date, notable observations, and storage location. That may sound bureaucratic, but in practice it is worth its weight in gold. At the latest when you carry out germination tests months later or want to repeat a cross, good documentation separates serious seed production from mere trial and error.
We have often seen growers produce interesting seeds but no longer know which branch was pollinated when or which male plant was involved. That causes a large part of the breeding value to be lost. Anyone who works cleanly can later evaluate, compare, and improve results in a targeted way.
Sources
- Clarke, Robert C.; Merlin, Mark D. – “Cannabis: Evolution and Ethnobotany”, 2013
- Caplan, David; Zheng, Y.; Dixon, M. – “Optimal Rate of Organic Fertilizer during the Flowering Stage for Cannabis Grown in Two Coir-Based Substrates”, 2017
- Small, Ernest – “Cannabis: A Complete Guide”, 2016
- McPartland, John M. – “Cannabis Pests and Diseases”, 1996

About the Author – Hannah
Hannah focuses on researching, contextualizing, and observing current developments in plant care and modern cultivation techniques. Her focus lies on new methods, optimizing growth conditions, and making complex topics accessible. Her content complements practical experience with analysis, updates, and a keen eye on emerging trends.
Content is regularly reviewed and updated.
This article was created with AI support and editorially reviewed.
More about the team behind LeafConnect