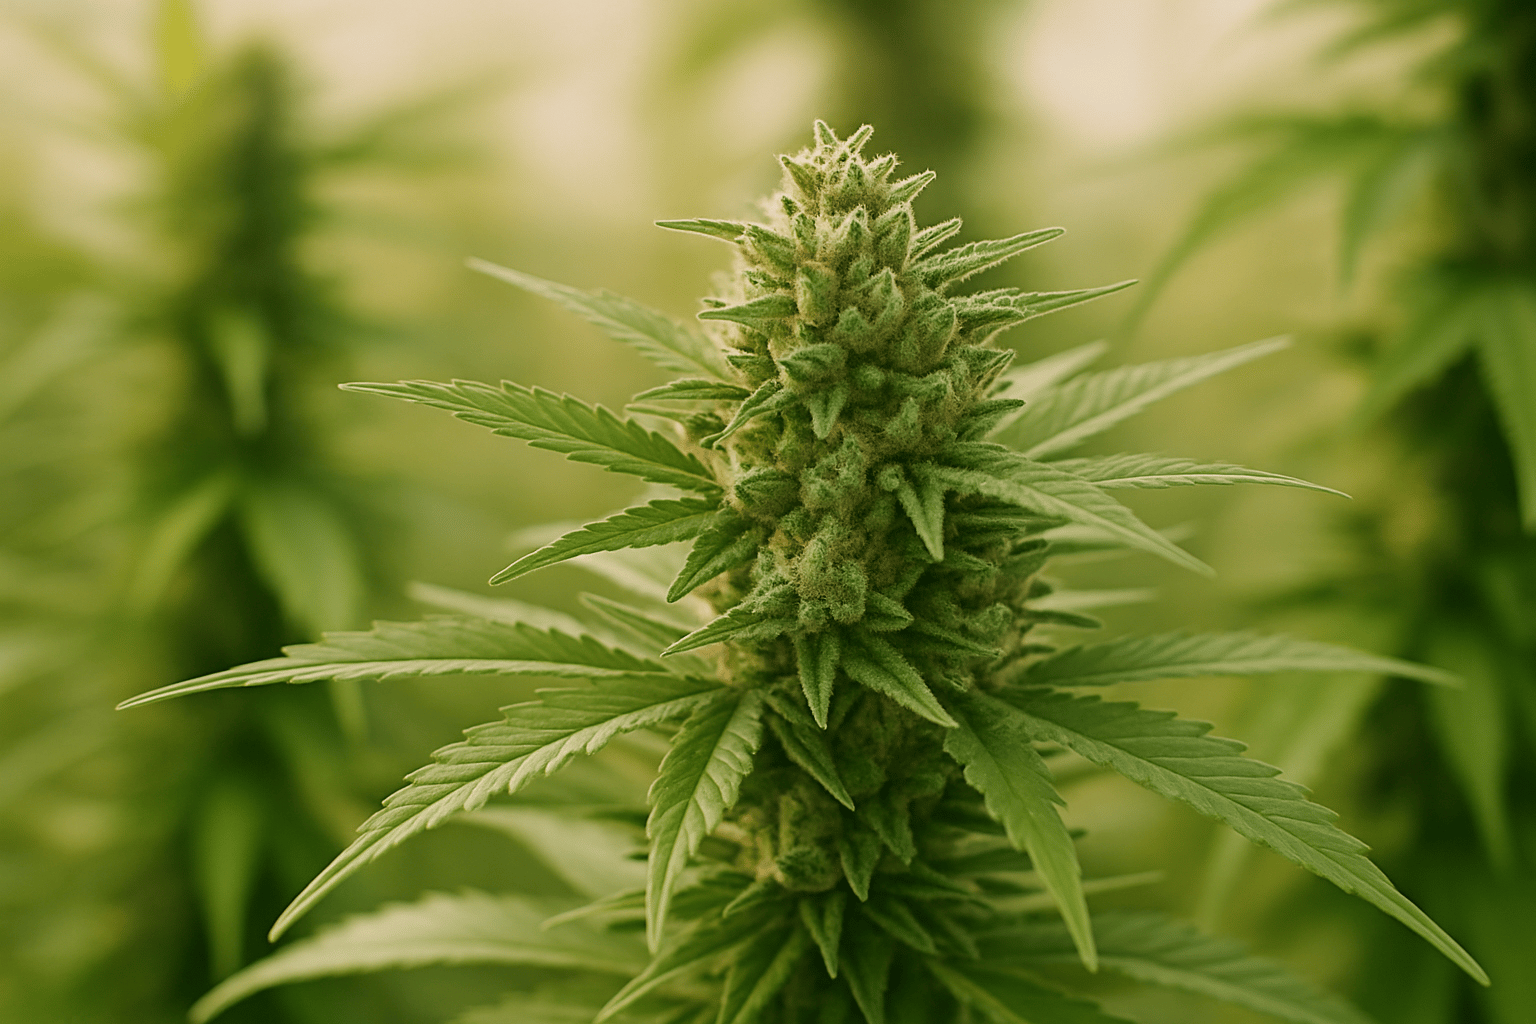
Why Harvest Determines Quality, Effects, and Storage Stability
Many growers invest weeks or months into genetics, climate, nutrient management, and pest control—only to give away a large part of the plant’s potential in the final days. We see exactly that again and again in practice: plants were guided cleanly through the flowering phase, but harvested too early, too late, or under poor conditions. The result is flowers with flat aroma, unnecessarily harsh smoke, lower cannabinoid yield, or increased mold risk.
Harvest is not a single cut, but a process consisting of ripeness assessment, preparation, cutting technique, hygiene, drying, and subsequent curing. Anyone who works cleanly here preserves terpenes, protects trichomes, and reduces microbial risks. In our experience, the final week before harvest often makes more difference to the end quality than some fertilizer change in the middle of the grow.
It is especially important to understand that quality is not defined solely by maximum THC. Harvest timing also influences the ratio of different cannabinoids, the perception of aroma, and the type of effect. A cultivar harvested slightly earlier can feel clearer and more active; the same genetics harvested a bit later often feel more physical and heavier. If you understand that, you do not just harvest “ripe” plants—you harvest with purpose.
How to Reliably Determine the Right Harvest Time for Cannabis
The most common mistake is relying solely on the flowering time stated by the breeder. Those figures are only guidelines and usually apply under ideal conditions. Light intensity, root space, temperature, phenotype, substrate, and stress factors can all shift the actual ripening point significantly. A plant with heat stress or nutrient issues can look very different from a perfectly performing sister plant—even with identical genetics.
More reliable is the combination of trichomes, flower structure, and the plant’s overall development. For this, we always work with a loupe or microscope in the range of about 60x to 100x magnification. What matters are the resin glands on the calyxes, not on the sugar leaves. Sugar leaves usually mature faster and therefore give an earlier-than-accurate picture. Mature trichomes shift from clear to cloudy; later they turn amber.
As a rough guideline, the following has proven useful: mostly cloudy trichomes with a small share of clear heads usually produce a fresher, more active profile. Mostly cloudy with around 10 to 20 percent amber trichomes often delivers the best compromise between potency, aroma, and mature effects. If the amber share rises significantly beyond that, the effect tends to become heavier, while the fresh top-note aroma of some cultivars may already begin to fade slightly.
Which Ripeness Indicators Really Matter
In addition to trichomes, other signals help. Most flowers have reached their final density, new white pistils are barely appearing anymore, and a large share of the existing hairs has darkened and receded. However, the same applies here: pistils alone are not a reliable criterion. Some cultivars continue producing new hairs late into flower, especially when light, heat, or foxtailing play a role.
A practical rule of thumb from experience: when the buds are barely gaining visible size from week to week, the calyxes are swelling noticeably, and the aroma in the room becomes clearly denser and deeper, the harvest window is often close. Outdoors and in the greenhouse, you should also check daily for Botrytis, especially in dense colas after rain, dew, or high humidity. In such cases, a slightly earlier, clean harvest is often better than trying to squeeze out a few more days of ripeness while risking mold. You can find more on this in the article Botrytis in cannabis.
| Characteristic | Too Early | Optimal | Too Late |
|---|---|---|---|
| Trichomes on the calyxes | Mostly clear | Mostly cloudy, 10–20% amber | High amber percentage |
| Pistils | Many still bright white | Mostly darkened and receded | Almost all dark, partly overripe |
| Flower density | Still building | Mature and firm | Hardly any gain, partial quality decline |
| Effect tendency | Lighter, often immature | Balanced, cultivar-typical | Heavier, duller |
Preparation Before Harvest Day: Climate, Water, Hygiene, and Planning
A good harvest does not begin with the scissors. In the final 7 to 14 days before cutting, the climate should run especially stable. In most setups, around 20 to 26 °C with moderate humidity is ideal. Excessively high humidity shortly before harvest massively increases the risk of mold in dense flowers. Too much heat, on the other hand, accelerates terpene loss. With highly aromatic cultivars in particular, you notice that immediately later in the jar.
Whether to “flush” before harvest is often discussed dogmatically. Our experience: in soil, a moderate tapering off of nutrient input in the final days can make sense if feeding was previously rather heavy. In coco or mineral systems, the approach has to be more nuanced because the plant reacts more directly to the nutrient solution there. What matters less is a blanket flushing ritual and more clean nutrient management throughout the entire grow. If you have been overfeeding the whole time, you will not rescue quality with three days of water. If you want to explore the topic further, you will find the fundamentals for a clean finishing phase in fertilizing cannabis and watering cannabis properly.
Logistical planning is also important. Before harvest day, scissors should be cleaned, gloves prepared, drying nets or hanging options set up, and the drying room tested. The greatest stress arises when the plants are cut but the room is still too warm, too bright, or too humid. Then you lose quality in hours, not days.
The Final 24 to 48 Hours Before Harvest
The question keeps coming up whether complete darkness before harvest offers advantages. From practical experience, we can say: the effect is often overestimated. What determines resin, aroma, and ripeness is the entire flowering process, not a single trick at the end. If someone wants to give 24 hours of darkness, that generally does no harm as long as climate and air movement are right. But it is not a quality substitute for correct timing.
It is usually more sensible not to cut the plant immediately after heavy watering. Slightly lower water content in the tissue can make the subsequent drying more even. However, you should not let it dry out completely either, because that creates unnecessary stress and tends to degrade the plant at the end rather than improve it.
Harvesting Cannabis: Clean Technique for Flowers Without Quality Loss
Harvesting is ideally done in a cool, clean environment with as little direct light as possible. UV and heat are enemies of sensitive cannabinoids and terpenes. We almost always wear nitrile gloves, clean the scissors regularly with alcohol, and work calmly rather than frantically. Resin-smeared tools crush plant tissue and make cuts imprecise.
There are basically two approaches: cut the whole plant or large branches intact, or break the plant down into smaller sections. Whole plants dry more slowly and often a bit more evenly, which can be an advantage in dry indoor environments. Smaller branches are more practical when humidity is higher or when you want to reduce mold risk in very dense flowers. In the greenhouse or outdoors, where buds often ripen unevenly, we also frequently harvest in stages—taking the upper, finished colas first and the lower areas a few days later. That is an underestimated quality lever, especially with large plants. If you grow under glass, it is also worth reading growing cannabis in a greenhouse.
When handling the plant, the rule is: touch it as little as possible, and if you do, handle it by the stem rather than the flower. Every unnecessary touch damages trichome heads. Especially with very ripe, frosty cultivars, you quickly see resin traces on gloves or trays after rough handling—that is lost quality.
Wet Trim or Dry Trim?
With wet trim, the large fan leaves and often part of the sugar leaves are removed directly after cutting. It is clean, fast, and reduces moisture on the flower surface. In humid environments, this is often the safer method. The downside: the buds dry faster, and if the room air is too dry, the aroma can become flatter.
With dry trim, more leaves remain on the flower during drying. That slows water loss and offers some protection to the surface. In our day-to-day grow work, this works especially well in dry heated air or when you want to dry very terpene-heavy cultivars gently. The downside is the greater labor required after drying and increased risk if climate and air circulation are not set correctly.
There is no universal right or wrong here. The better method is the one that fits your drying room. If you dry at 45 percent humidity, dry trim is often the better choice. If you are at 65 percent and hanging thick outdoor buds, you should be more inclined to pre-trim cleanly and monitor closely.
Drying: This Is Where Good Cannabis Is Either Refined or Ruined
If I had to name one section that growers underestimate most often, it would be drying. Drying too quickly locks in chlorophyll and makes the aroma seem flat and “green.” Drying too slowly in stagnant, humid air promotes mold and microbial spoilage. The goal is controlled, even water loss.
For many setups, around 16 to 20 °C and 55 to 60 percent relative humidity in the dark with gentle air movement has proven effective. The key word is gentle: a fan should never blow directly onto the buds. Air should be moved, not blasted at the flowers. Direct airflow dries the outside too quickly while the inside remains moist. That is exactly when you later get an increased risk of musty notes or mold in the jar.
Depending on flower size, trim method, and climate, drying usually takes 7 to 14 days. Very small, heavily pre-trimmed buds may be ready faster; large whole branches can take significantly longer. A good practical indicator is the small stem: when it no longer just bends but breaks with a slight snap, the outer drying is usually far enough along for the next step. It is not a lab value, but it is a very useful everyday marker.
Typical Mistakes in the Drying Room
- Too warm: Above 22 to 23 °C, volatile terpenes are lost more quickly.
- Too dry: Below around 50% RH, buds dry too fast on the outside and often become harsh.
- Too humid: Above 62 to 65% RH, mold risk rises significantly.
- Too much light: Light accelerates the degradation of sensitive compounds.
- Too little monitoring: Especially dense main colas must be opened and checked regularly.
If you grow outdoors or in the garden, you should plan harvest not only by ripeness but also by weather window. A week of cold nights, fog, and rain can do more damage in dense flowers than a minimally earlier harvest. For the outdoor context, the article growing cannabis in the garden is also helpful.
After Drying: Cure, Store, and Let the Aroma Mature
After drying, the flowers are smokeable, but often not yet at their qualitative peak. Only controlled curing in jars or suitable containers brings the profile together. During this process, residual moisture inside the flowers equalizes, grassy notes continue to break down, and the aroma becomes rounder. Many growers call this step “curing” or fermenting. What is meant is not wild fermentation, but controlled post-ripening under stable conditions.
For this, we fill the buds only loosely into clean, airtight jars. The target range inside is usually around 58 to 62 percent relative humidity. In the first week, the jars are opened briefly once or twice a day, later less often. If a batch smells dull, ammonia-like, or clearly damp when opened, it was stored too wet and must be taken out immediately for further drying. This is one point where you should not compromise.
The curing process takes two to eight weeks depending on the cultivar and drying course, and some flowers continue to improve beyond that. Fruity, bright terpene profiles often show a clear improvement after just two to three weeks. Heavy gas, Kush, or spice profiles often continue to gain over four to six weeks. You can find a more detailed guide at curing cannabis.
Proper Storage for Stable Quality
In the long term, cannabis stores best in a cool, dark place with as little temperature fluctuation as possible. Frequent opening, light exposure, and warm rooms accelerate quality loss. If you are storing larger quantities, it is ideal to work with several smaller containers instead of one large one. That way, the entire harvest is not exposed to air and light every time.
The smell also changes significantly during drying and storage. A very intense smell is not automatically a quality defect, but it can be problematic in residential situations. You can find practical guidance on this in the article understanding cannabis odor.
Special Situations: Outdoor, Mold, Staggered Harvest, and Problem Plants
Not every plant performs ideally all the way to the end. Especially outdoors, with large clones, or in greenhouses, there are often areas that ripen faster than others. In such cases, staggered harvesting is, in our view, often the more professional solution than a blanket full cut. Upper colas usually receive more light and ripen earlier, while lower bud sites can still benefit from a few more days.
If mold is suspected, you must act without compromise. Affected flowers should be removed generously and not processed further. Gray mold often sits deeper in the tissue than you can see from the outside. A common beginner mistake is cutting away only the visibly bad spot and keeping the rest. That is risky and not a good quality decision. In cases of heavy infestation, it makes sense to inspect the entire batch critically and, if in doubt, seek expert advice.
Plants showing stress symptoms should also not be judged by a fixed formula. Severe nutrient excess, heat, light stress, or viruses can distort the ripeness picture. In those cases, the calyx trichomes and the actual flower development matter all the more. Anyone working with clones benefits in the long term from clean source genetics and healthy mother lines. Poor plant health through to the end almost always costs yield and quality.
The Most Common Harvest Mistakes in Practice
Harvesting too early is the classic mistake. The buds already look good, the smell is strong, and impatience wins. The result is often lower density, less developed aroma, and an effect that feels unfinished. Especially in the final 7 to 10 days, calyxes can still swell visibly.
Harvesting too late is the counterpart. Some growers wait for “even more amber” even though the plant has long since been in the optimal window. Then the profile loses freshness, and with outdoor plants the risk of Botrytis rises unnecessarily. More ripeness does not automatically mean more quality.
Improper drying ruins more harvests than a slightly mistimed cut. Overheated attics, drying boxes with a direct fan, or improvised rooms without a hygrometer are typical problem sources. Anyone who invests in a good climate is investing directly in flavor and shelf life.
Handling too roughly is also widespread. Buds are thrown into boxes, squeezed during trimming, or moved around too often for no reason. Trichomes are delicate, especially once the flowers begin to dry. Careful work shows up later not only visually, but also in resin feel and aroma.
Storing too wet remains one of the most expensive mistakes. If the inside of the jar stays too moist, the batch can turn quickly. Better to dry for half a day longer than to lose valuable flowers to mold or musty curing.
Sources
- United Nations Office on Drugs and Crime – “Recommended methods for the identification and analysis of cannabis and cannabis products”, 2009
- National Academies of Sciences, Engineering, and Medicine – “The Health Effects of Cannabis and Cannabinoids”, 2017
- McPartland, J. M. – “Cannabis Botany and Biotechnology”, 2018
- Clarke, Robert C.; Merlin, Mark D. – “Cannabis: Evolution and Ethnobotany”, 2013

About the Author – Ben
Ben has been intensively involved in the cultivation and care of cuttings and the healthy development of plants during the growth phase for several years. His focus lies on low-stress training methods, stable growth conditions, and avoiding common care mistakes. The content is based on practical experience, proven methods, and real observations from daily work with young plants.
Expert contribution & updates: Hannah – Research, contextualization of current methods and observation of new developments.
This article was created with AI support and editorially reviewed.
More about the team behind LeafConnect